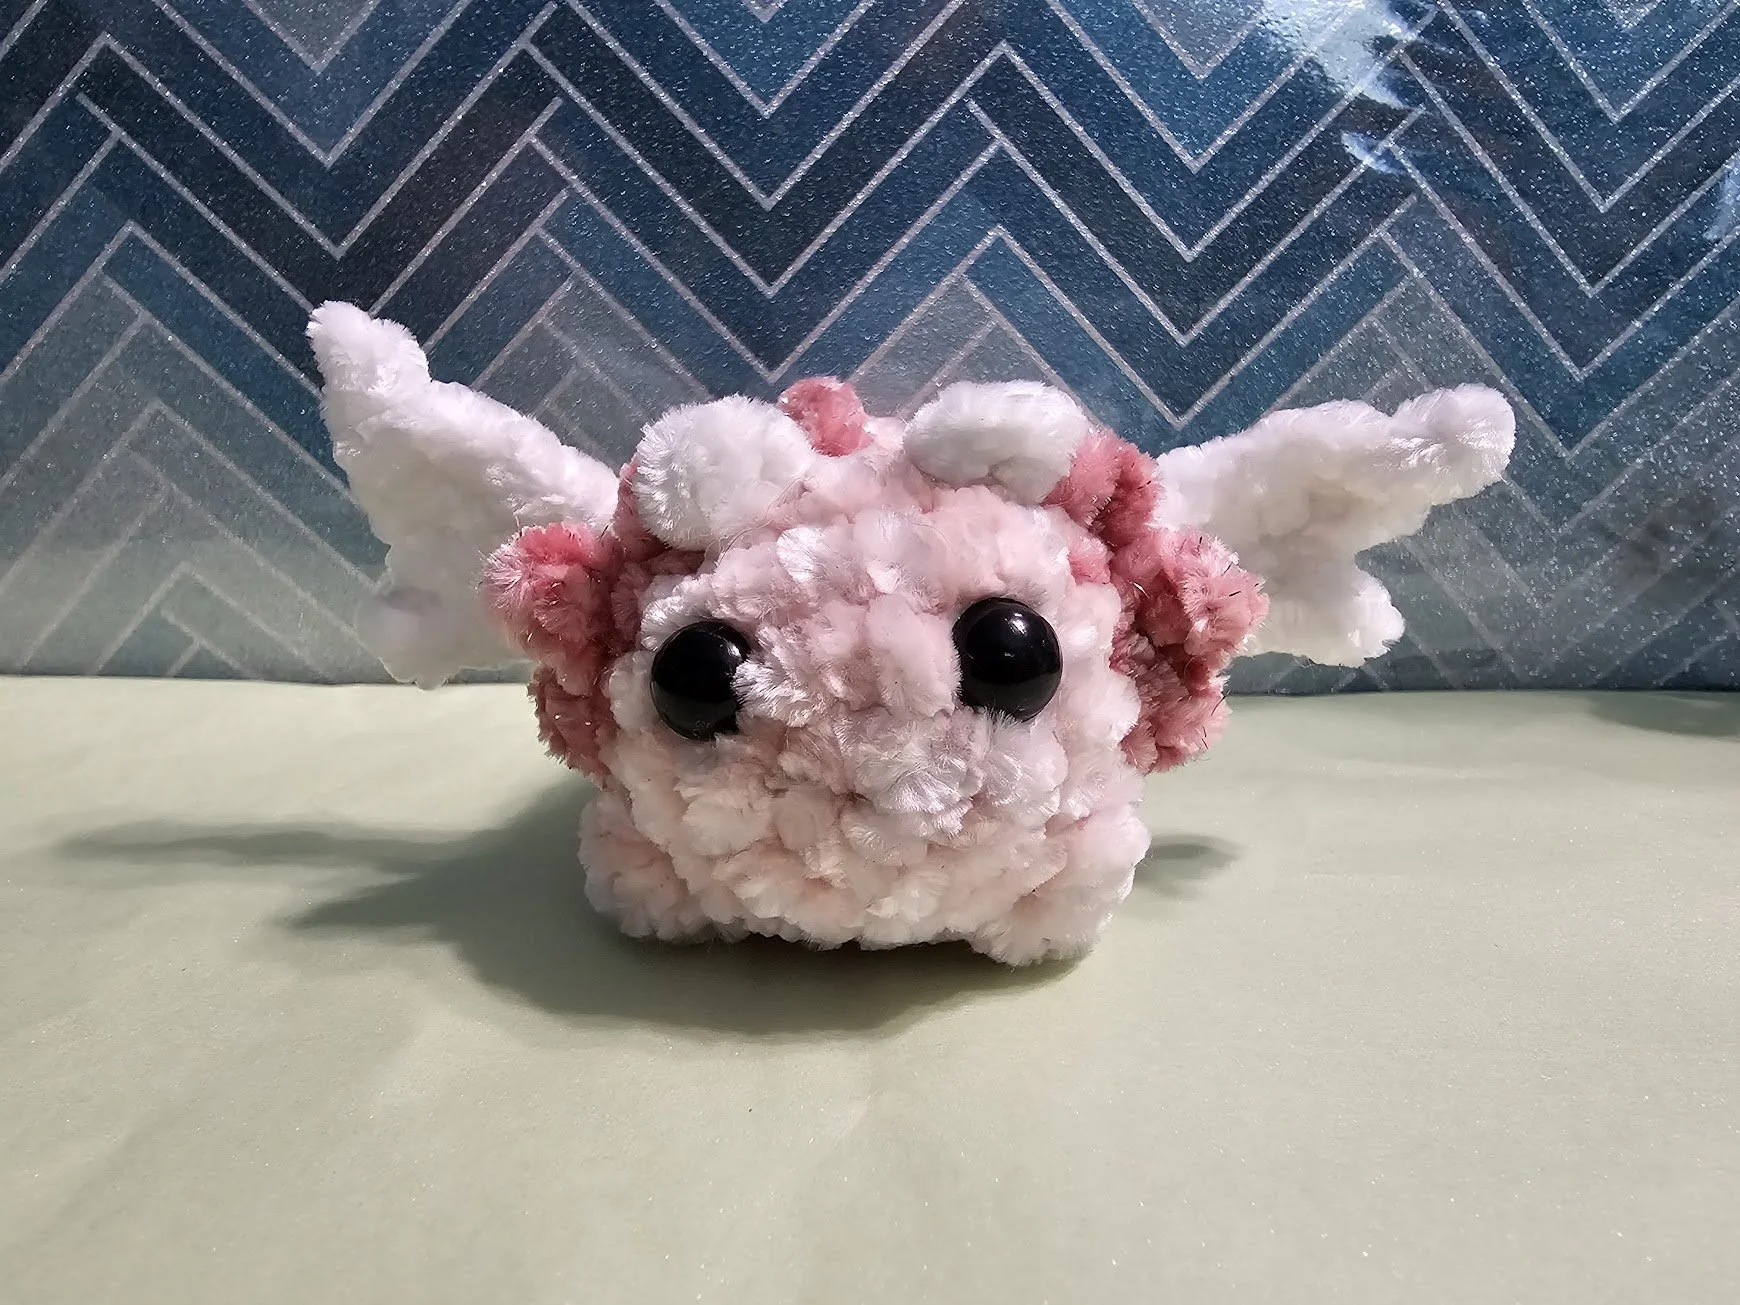
Amara and Nessa the Axolotl Dragons
In Mexico there is an ancient lake named Lake Xochimilco. You may have heard that it is the only body of water that is a native habitat for axolotls. However, if you are very lucky, you might catch a glimpse of another creature. At first look, they seem like axolotls, but if you sat by the edge of the lake for awhile one of these creatures might deem you trustworthy enough to get a closer look. You would see that they also have wings and horns, like a dragon!
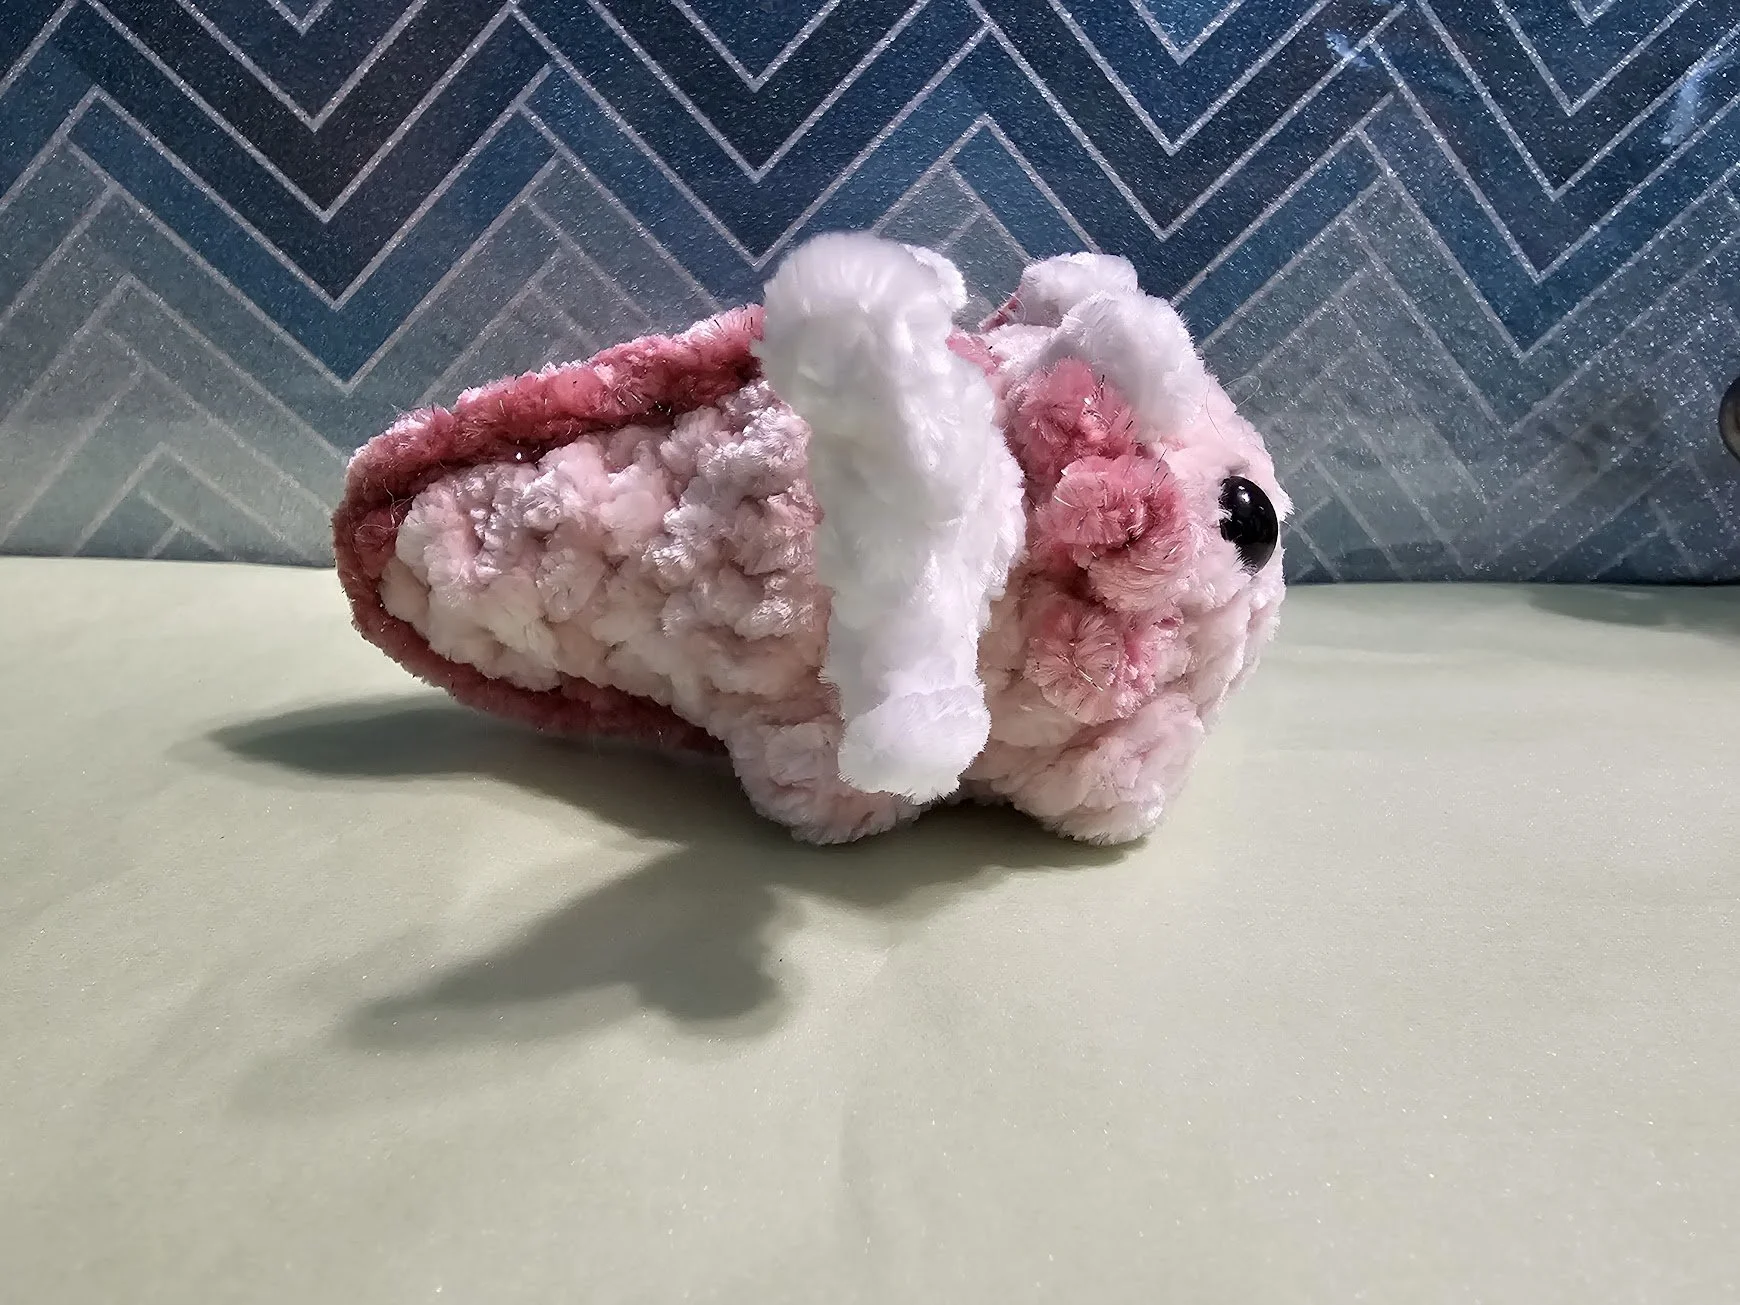
Amara is a rare axoltol dragon that is a guardian of Lake Xochimilco. Although small, she knows how to make herself frightening to those who are not treating the lake and its inhabitants with respect. She can jump out of the water at high speeds and uses her wings to seem bigger than she is. Although she’s not a fire-breathing dragon, Amara can shoot out a stream of boiling hot water. When not protecting the lake, Amara loves to snuggle with her baby, Nessa and teach her about the world they live in.
With these patterns you can create your own axoltol dragons! Below you can find the free version of Nessa. If you’d like a printable PDF version, you can find it here.
You can also find Amara’s pattern here.


Free Pattern for Nessa the Baby Axolotl Dragon
Stitch Abbreviations and Special Stitches
Sc: single crochet
Ch: chain
Ss: slip stitch
Hdc: half double crochet
Inc: increase (place 2 stitches in the same stitch)
Dec: decrease over 2 stitches, I like to use invisible decreases
Bbl: bobble, work 5dctog in one stitch. (Bobbles may need to be pushed out to other side of your work.)
FO: fasten off
BLO: work into the back loop of the stitch
[]: Stitches in these brackets go into the same stitch
Notes
This pattern is written in US terminology.
This pattern is worked in continuous rounds unless otherwise stated.
Each part starts with a magic ring unless otherwise stated, but you can use the ch2 starting method if you prefer. You can also use regular acrylic yarn to make your magic ring if you have trouble with the chenille yarn. To ensure the magic ring is secure, I like to crochet several stitches in round 2 over the tail.
I highly recommend using a stitch marker to keep track of the first stitch of each round
When working into a chain, I like to go in the back humps of the chain rather than the side. It makes the edges look neater.
() at the end of a round/row indicate the stitch count for that round/row
This pattern is no sew, but you can sew the parts on if preferred.
Please if you have any questions or need clarification on any part, reach out to me and I will help! You can contact me at wolvyncreations@gmail.com or @wolvyncreations on Instagram
Materials
Yarn in 3 colors
Color A: Bernat Velvet in Blush Pink
Color B: Bernat Velvet in White
Color C: Juicy Couture Luxe Velour Sparkle in Dusty Blush
A little bit of black yarn for embroidering the mouth if preferred
hook that goes with the yarn you used (I used a 3.5mm)
Scissors
Stuffing
Safety Eyes ( I used a 9mm)
Yarn Needle
Wings
Make 2. With Color C
R1: ch2, sc in the 2nd ch from hook (1)
R2: ch1, turn, inc (2)
R3: ch2, turn, ss in the 2nd ch from hook, 2sc (3)
R4: ch1, turn, sc (1)
R5: ch2, turn, ss in the 2nd ch from hook, sc, then going along the top fo the wing, work 2hdc, sc, ss (6)
FO. Leave short tail. This piece will be crocheted in.
Body
With Color A. You may have to adjust which stitches the bbls and wings go into based off what yarn you choose and your tension.
R1: 6sc in a magic ring (6)
R2: 6inc (12)
R3: (sc, inc) x 6 (18)
R4: stitches in brackets [] will be in Color B. 2sc, bbl, sc *BLO[ss, ch3, ss], BLO[ss, ch4, ss], BLO[ss, ch3, ss]* 4sc, repeat *, sc, bbl, 2sc (18)
R5: 18sc, when you get to the frills, work into the first ss of each frill, making sure the frills stay in front of your stitches (18)
R6: 6sc, attach wing in the next sc, 5sc, attach wing in the next sc, 5sc (18)
*put eyes in between R3 and 4, about 1 stitch away from the middle frill
R7: 2sc, bbl, 13sc, bbl, sc (18)
Start stuffing and keep stuffing as you go
R8: dec, sc, 7dec, sc (10)
R9: dec, 8sc (9)
R10: 9sc (9)
R11: (sc, dec) x 3 (6)
R12: 6sc (6)
R13: (sc, dec) x 2 (4)
FO, finish stuffing, sew closed and weave in ends.
Horns
Attach Color C to the stitch in front of the top frill, ch2, sc in the 2nd ch from the hook, ss back into the same stitch. FO. Repeat in front of the top frill on the other side of the head. Weave in ends
Body Frill
Attach Color B to the top of the head, 1-2 stitches behind the face frills, sc down the center of the back and tail, and go along the bottom of the tail until you reach the body again.
